
 Integrating tunnels
Tunnels are an important part of Terminal Velocity in my opinion - they break up the gameplay from its usual "dogfighting over open heightfields" with "carefully navigating a cramped space with obstacles", and without it I suspect the game would be significantly less interesting. So clearly an important aspect to add!
An overview of the structure
Tunnels are a more complicated beast than most aspects of the game, because they are actually entire levels instead of just objects. This means that they have all the complexities of levels: separate palettes, texture lists, entity lists, etc. While this post is only limited to ensuring the tunnel level itself is loaded and integrated, it's useful to know that just loading them is already a bit more more involved.
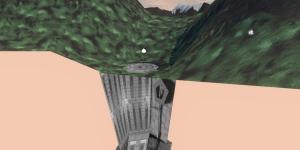
To integrate tunnels, a few parts are needed. First, during the regular open levels you can see through an opening in the ground into the tunnels where they connect. Second, you actually have to be able to fly through them. Finally, tunnels are also used to switch between above-ground mode, and caves (something I wrote about before).
In the original game, there are some limits that were used. For one, while tunnels can be quite long, you can't see very far into them in the game - there's simply a limit to how many sections of the tunnel are drawn. Second, when it comes to going into the tunnel, the game would actually make a save game and likely unload part of the ground level. This would cause a short, but noticeable stutter when going into a tunnel.
Since I'm targeting modern computers, using a modern engine, having a bit more computing power available than the 486 & pentium CPUs that the game originally targeted, my goal was to instead integrate tunnels as directly and cleanly as possible into the game.
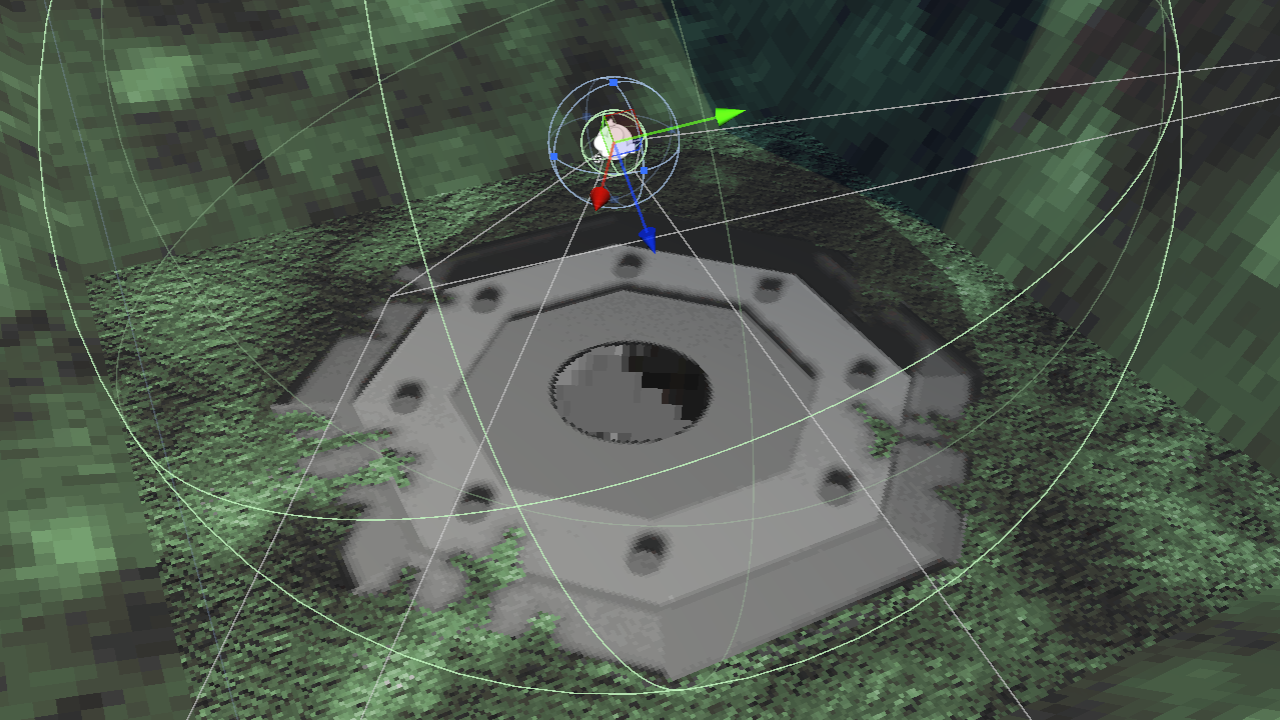
Viewing tunnels while above-ground
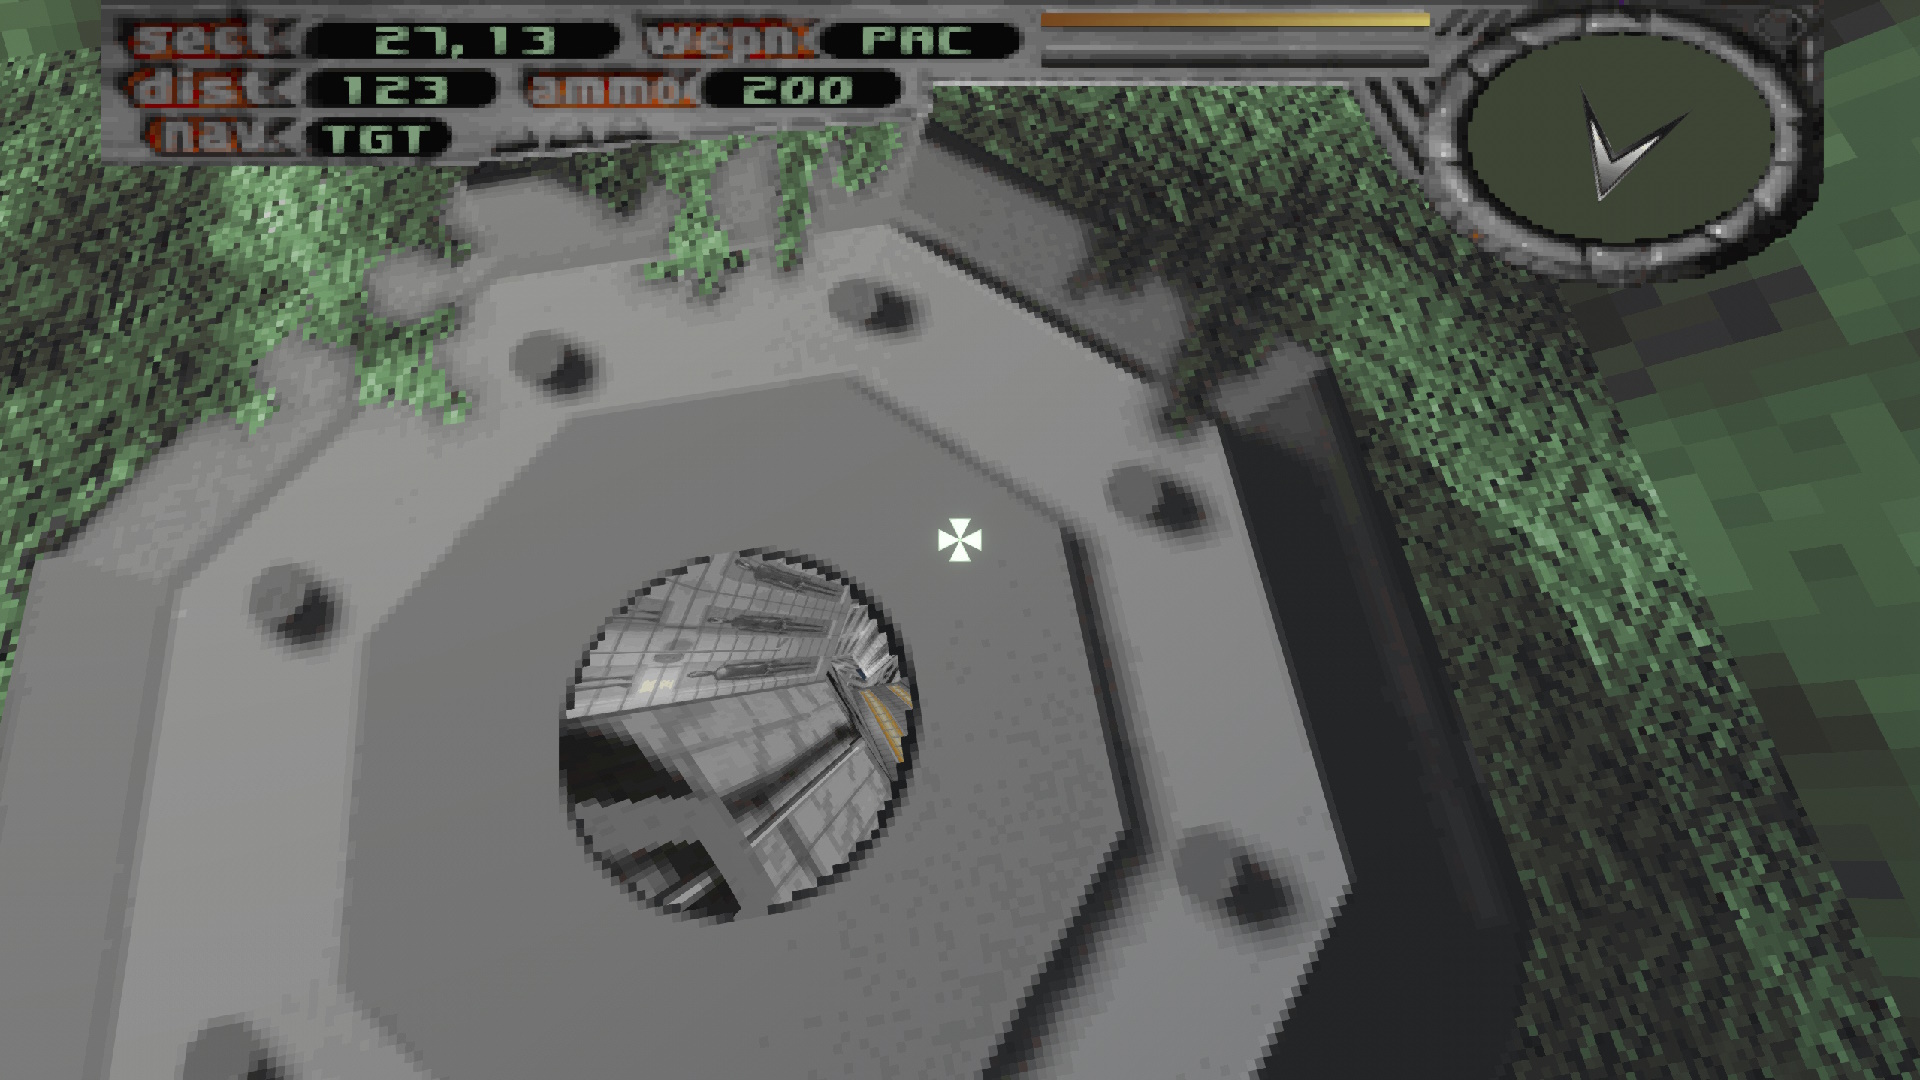
The basics of this part is really straightforward: Just align the start or end of the tunnel to the entrance or exit tile of the heightmap. In reality it is of course a bit more difficult.
Part of this is because of a choice I made: I want to only load a tunnel once. This means that I have only one chunk of geometry that needs to be both at the entrance and exit tiles.
 Art by Kitchiki
The solution I used for that is simple though: each entrance and exit tile gets a bounding box, and through this it can be detected when the tile becomes visible by checking if it's inside the camera frustum. If this happens, we align the entire tunnel geometry with the tile and this gives the appearance of a continuous level!
 Art by Kitchiki
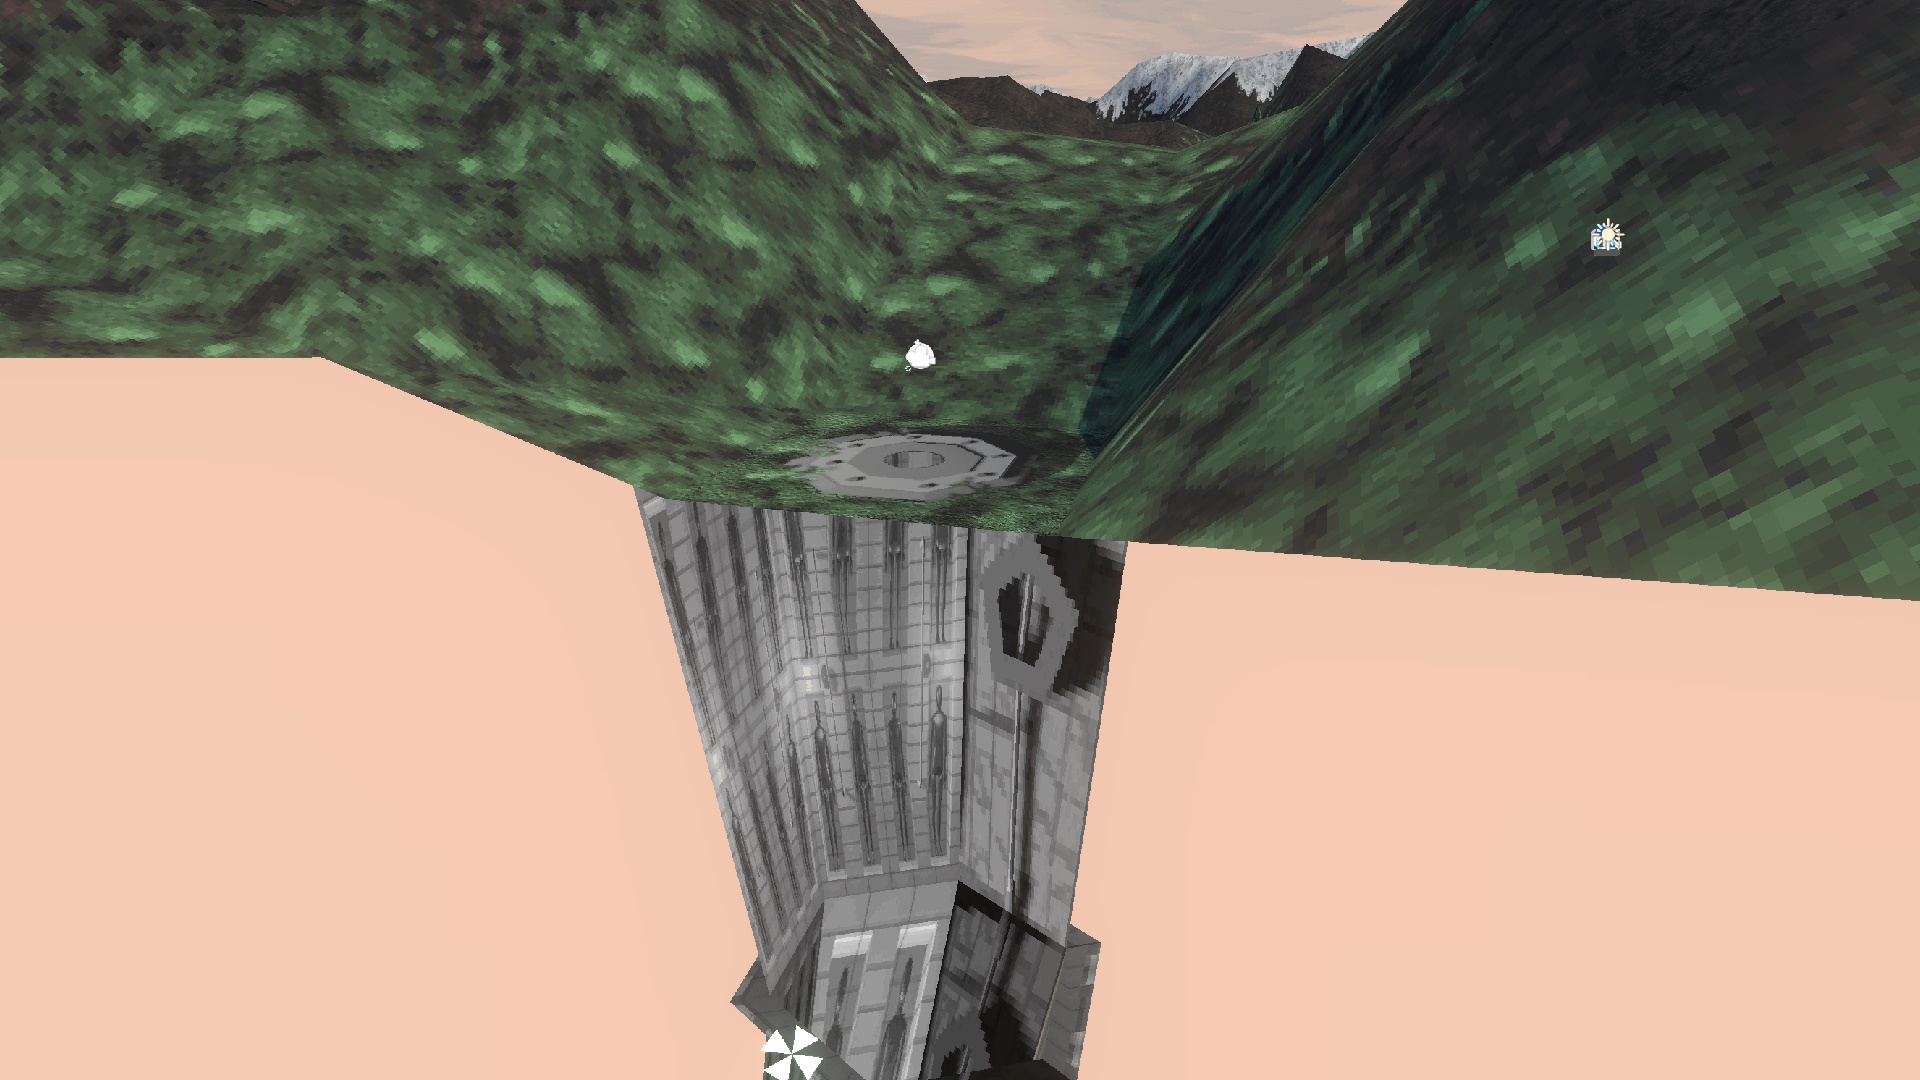
There was a problem I ran into quite quickly though: some times, the entrance and exit of the same tunnel are close enough to each other that the far tile could enter into the frustum, for example while you are turning more towards the entrance you want to fly into - and this would mean the tunnel interior would suddenly disappear as it would be aligned with the far away tile.
I used a simple solution for this that should be sufficient: when a tile becomes active and would like to grab the tunnel interior, it checks with its paired tile to see if both are visible, and if so which one is closer. The closest tile keeps the interior.
Tunnel collision
If you're already in the tunnel, it's obviously necessary to have proper collision on the tunnel's walls. For the most part this is very simple: a lot of tunnel sections have entirely static geometry, so a regular mesh collider can be constructed reusing the same geometry I already use to render the tunnels.
 Art by Kitchiki
But some tunnel segments rotate, and some of those rotating segments are skewed. This complicates things. Additionally, I have to work with box colliders, because those play nice with being moved, and colliders from adjoining sections should not extend into the inside of the tunnel.
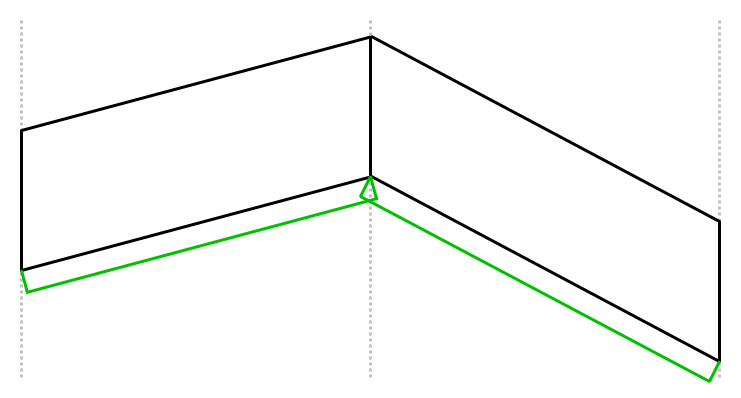
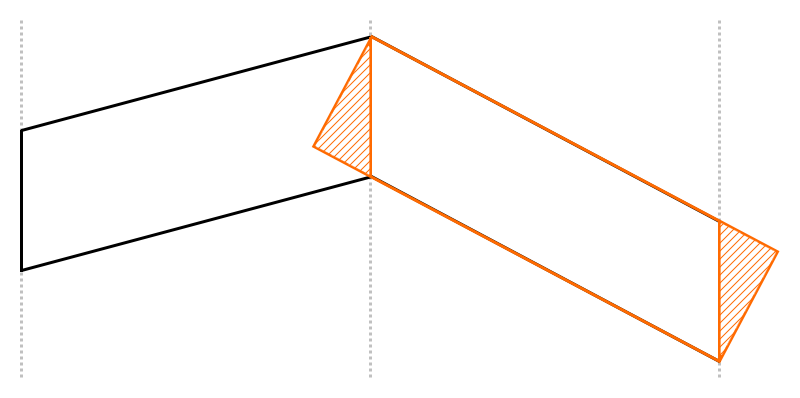
Left: From the side, colliders can be aligned to the plane as expected.
Middle: From the top, colliders cannot follow tight alignment as they would protrude across segments.
Right: Using wider colliders allows for no protrusions.
As such, I settled on collider alignment as explained in the above images.
Having settled on that, computing the position of where a collider is supposed to be is no longer that difficult. The center position of the collider is right in the center of the wall polygon, which is in the middle of the line of either two opposing vertices of the polygon.
 Art by Kitchiki
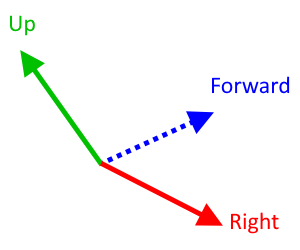
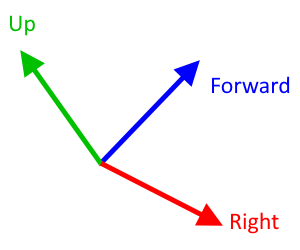
The orientation is determined by constructing effectively a transform. We need a local up, right and forward vector. Up is easy: that is simply the plane's normal. Forward is in the general direction of the tunnel (in my code aligned to positive Z), but obviously a (0, 0, 1) vector isn't properly forward compared to the normal. To solve this, we first compute the cross product between the normal and this (0, 0, 1) vector, which gives us the properly aligned right vector! And now the cross product between the normal and right vector produces the forward vector we need. Orientation obtained!
With both position and orientation being known I can just move the colliders where they should be every frame, and now I have colliders for any type of tunnel segment.
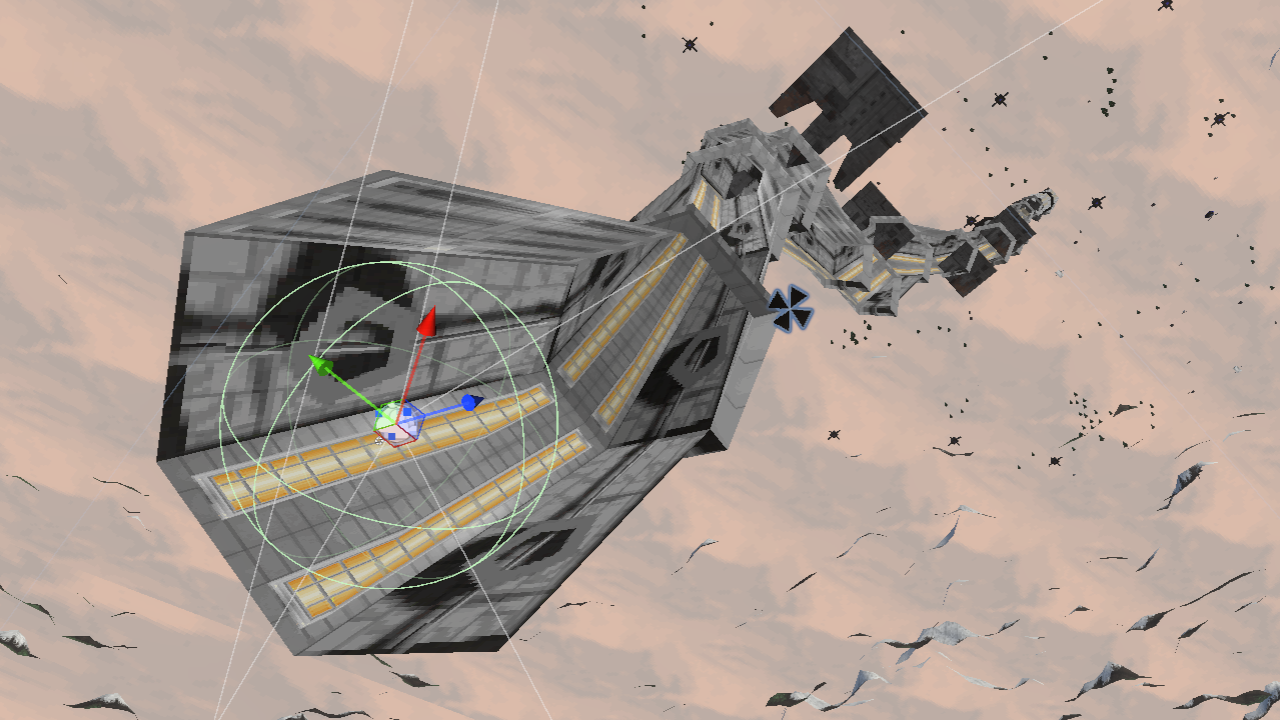
Flying into tunnels
Finally, it's time to connect seeing the tunnel outside and flying through it together.
There are two parts left at this point: The tunnel must be put somewhere while the player is flying through it, and the player must have a smooth experience of flying in to and out of the tunnel.
For the first point I am considering a few things:
- The player is always flying forward in the tunnel, and as such can't ever see behind them.
- The player can see ahead of them, and so they may see beyond the exit.
Based on this, I decided that once a player is in the tunnel, the tunnel should simply be aligned with the exit tile (as if they were looking into the exit from outside). This way it's possible to see what is beyond the exit of the tunnel without any additional work.
The "align to tile" code is already available, so all I need to do is activate that when a player flies into the tunnel. That is something I can easily detect with a trigger-type collider aligned with the tunnel entrance tile.
 Art by JohisArt
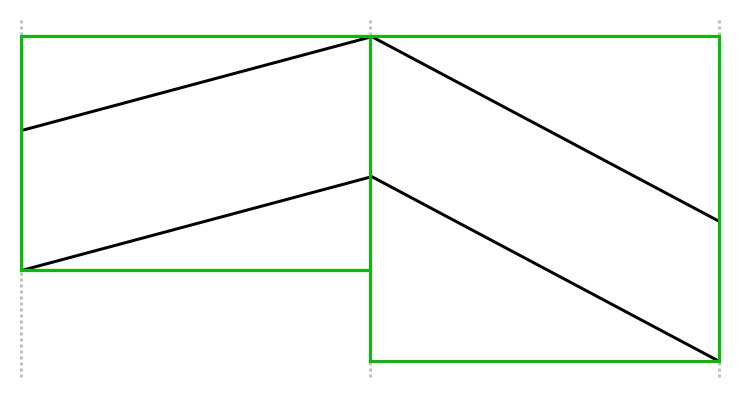
The only thing left is to teleport the player. When they enter the tunnel, I know their position relative to the entrance, and by converting that tile-relative position to be relative to the actual tunnel geometry instead I can teleport the player to the correct position in the tunnel so that it's completely transparent that this even happens!
Game development is sneaky like that.
Right: Where they are after entering.
And thanks to all this I have managed to make the experience of entering a tunnel change from this:
To this:
 Art by JohisArt
So smooth!